Friday, July 29, 2011

Owl Post


In Harry Potter, all mail is delivered by owls. Although you might not be able to do that with real owls, here is a card that will fulfill that purpose!


Supplies


-At least three different corresponding pieces of fabric
-A glue stick
-Hot Glue
-Paint brush
-Two buttons
-Card Stock


Instructions

1. Take a card sized piece of card stock, fold it, and cut it into an owl shape, make sure you don't loose your fold.

2. Cover your card with a piece of fabric, glue it on, and trim the edges, so the fabric is the same size and shape as the card.

3. Cut out two small circles out for the eyes, it is best to cut them out at the same time, so they are the same size.

4. Cut a larger circle out for the belly. Cut a small triage out of this fabric as well, this will be the beak. 

5. Glue these pieces on the owl.

6. Then hot glue on buttons for eyes.

Lots of Love,

Rapunzel

Thursday, July 28, 2011

Feathered Friends


Here is a fun craft that will put a use to all those fabric scraps that don't seem to serve any real purpose except for cluttering up you craft room. 


This cute owl can be use as gift bag, or as decoration. 

Supplies
-Paper lunch bag
-At least three different corresponding pieces of fabric
-A glue stick
-Hot Glue
-Modge Podge
-Paint brush
-Two buttons

Instructions

1. Cut the top of your paper bag to look like ears. An easy way to do that is fold it in half length wise, and cut a quarter of a circle in the top. 

2. Take a rectangle of fabric that is the same width of you bag, and same height, measuring from tip of ears to bottom of bag, and glue it on. (do this over the side of the bag with the seam)

3. Turn the bag over backwards, and trim the fabric so it is the same size and shape of the bag.

4. Cut out two small circles out for the eyes, it is best to cut them out at the same time, so they are the same size.

5. Cut a larger circle out for the belly. Cut a small triage out of this fabric as well, this will be the beak. 

6. Glue these pieces on the owl.

7. Use a brush to Modge Podge your bag so the the fabric won't come un-glued.

8. Once the bag is dry, hot glue on buttons for eyes.

Once it is done, you can stuff tissue paper in the bag, so that it looks fuller, and cutter.


Have fun!!!!

Lots of Love,

Rapunzel 


Monday, July 25, 2011

Gail Carson Levine

Rather than posting about one good book, today I'm going to post about an author who has written a lot of really amazing fantasy books. She has even written a book about writing fantasy books! Her name is Gail Carson Levine. 


Her stories seem to fly off the page, you can't help but fall in love with them!!!

Her newest book is called A Tale of Two Castles.


It looks so good, but I haven't read it yet because there are 32 people in front of me on the hold list who also think it looks good. 

But, I have read most of her other books.
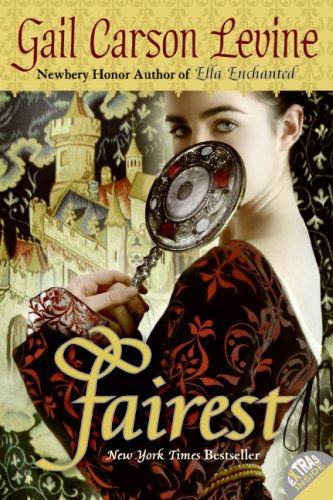
Last night I finished reading Fairest


Well, re-reading to be exact.


This book takes an exciting twist on the tale of Snow White. 


But, it is much more exciting. The Snow White character, Aza, is ugly. She is a hard worker, and does much more than just sing and look cute, although she does have an amazing voice. And her prince is much more than just handsome. 

The first books I read by her were the Princess Tales.

These are six, short easier to read fairy tale retellings. Personally, I think they are hysterical. Pascal doesn't see why, so maybe it is just me. You'll have to read them for yourself and tell me what you think. 

Then, there is Ella Enchanted. 


I have only read it once, and that was so long ago, I don't remember much about it except that I loved it! 

This one twist up Cinderella. 

And then there is the book Ever.


I don't think it is a fairy tale retelling, but I could be wrong. Rather than having the usual castle and kingdom flair of her other books, this one is set in a middle eastern type of world, very exotic. 

This next book was originally supposed to be a retelling ot the 12 dancing princesses. It is called The Two Princesses of Bamarre.


It didn't turn out that way though. I read it so long ago, that, once again, I don't remember much. But it is a very powerful story. 

And I can't forget The Wish!


This story takes place in our modern world. But, of course, it has a little bit of a magical twist.

But wait! There is still more!

She has written three Disney fairy books, I have only read Fairy Dust and the Quest for the Egg, but there are also Fairy Haven and the Quest for the Wand, and Fairies and the Quest for Neverland.

Then, there is the book Dave at Night.


Once again, I haven't read this one, but everything else she has written has been good, so I have high hopes.

And, then she has also written a few picture books!

Betsy Who cried Wolf, and Betsy Red Hoodie.

And, if you read her books, and want to write like her, you'll need Writing Magic:Creating Stories that Fly!


I love this book because I feel connected to Ms. Levine when I read it. I feel like I can do anything, and that someday, I 'll become a great writer!

I hope you find something you like. I know the I can't wait to read the ones that I haven't gotten to yet!

Lots of Love and Happy Reading,

Rapunzel


Saturday, July 23, 2011

Picture Perfect


Here is a fun and easy craft that will add a princessey touch to any girls room!


Supplies
-Photo frame
-Hot Glue
-Yellow Yarn
-Artificial Flowers ( I used fire flowers)


Instructions


Cut nine long pieces of yarn. The length you need will depend on your frame size. Pieces anywhere from 1-2 yards should work fine. Tie the pieces together at the top with a knot. Braid until you reach the end, and then knot that. 


The next step allows you to be fairly creative. Your finished piece will look something like this,


so it is a good idea to lay the yarn down in a few different desgins before you hot glue for the final time.When you are ready to do that, cut the knot off of one end of your braid. Hot glue that end down in a way that will not allow your braid to come undone. Then do a few dots of hot glue in the places where the braid lays flat on the frame, or the yarn over laps. You don't want to hot glue the whole braid down, because it will ruin the effect. Cut the knot of the other end, and hot glue that end down like you did the first end.


Once the braid is done, hot glue the flowers on. Gluing the flowers down over the end is a good way to hide the rough ends.


Happy decorating!


Lots of Love. 

Rapunzel


Wednesday, July 20, 2011

Fire Flowers

I have always loved the ribbon flowers where the edge is burned so that it is all frilly and pretty. But, the idea of using a match to burn the edge really freaks me out. Then, when I was talking to someone one day they said that when ever they do that they use a candle. So last week, I decided to give it a try, and I was super pleased with the results!


Sorry for the glare, I guess that the fabric is SOOOO silky, I should have turned off the flash. If you can't tell, there are a three white pearls in the middle.


Supplies 


Silky Ribbon or Fabric, I used fabric because I didn't want to have the width of the ribbon limit my layers.
Beads for the center, I used pearls to keep the elegant feeling.
Hot glue
Scratch paper
Candle
Alligator clip, I glued mine on to a clip, you don't have too, they also are cute glued  on photo frames, or you can even glue them on a pin to dress up a blouse. 


Instructions


1. Cover your surface with scratch paper so that you don't end up with hot glue on your counter.


2. Cut circleish shapes put of the fabric/ribbon. Mine ended up more ovalish, and due to the nature of the project, the circles don't need to be perfect. You want them slightly larger then you want them to be when they finished, but they won't shrink much. Although there are only three layers shown here,  I ended up using 4 in the end.


3. This next step is a WARNING!!!!! I feel it is so important, I will type everything from this point IN ALL CAPITAL LETTERS!!!!! CANDLES AND HOT GLUE ARE VERY HOT!!!!!! EVEN WHEN YOU ARE HOLDING YOUR FABRIC ABOVE THE FLAME, IT WILL BE HOT!!!!!! BE CAREFUL, PLEASE DO NOT BURN YOURSELF!!!!!!!!  IF YOUR FINGERS START TO FEEL UNCOMFORTABLY WARM. STOP. WAIT. AND BEGIN AGAIN!!!!!!! PLEASE DO NOT BURN YOURSELF!!!!!! 

4. Now that I have scared you to death, we can continue with the project :) It really isn't that dangerous, just please don't be stupid. At this point, plug in your hot glue gun, and light your candle.

5. Before you burn the layers for your flower, it is good to get a feel for what you are doing. Cut a scrap of fabric, and practice on it. This will show you how long you need to burn it without scorching it.

6. Once you have the feel, burn the layers of your flower. The best way to do this is hold you layer above the candle  and turn it fairly fast. It only takes a second to scorch the flower. Repeat with the other layers.

7. Next hot glue your layers together, a little goes A LONG way!!!

8. Finally, place a small amount of glue in the center of the flower, secure your beads there.

9. If you wish to glue it onto a  clip, put a small amount of glue on the clip, and place the flower on top. Clip the clip to a piece of paper for about 30 seconds, then take off. This keeps it from being glued shut. 

Enjoy your flower!

Lots of Love, 

Rapunzel


Sunday, July 17, 2011

By Lantern Light...


Isn't the idea of floating in a boat under lanterns so romantic? I think every girl would love to do something like that. 

Although it's not quite the same as floating lanterns, here is a craft that will light up your table, front walkway or porch. 


I got the idea form all of the mason jar crafts on Studio 5.

Supplies
-Modge Podge
-Tissue Paper 
-Glass Jar (Make sure you can get a lighted candle in!)
-Scratch paper 
-Glitter (optional)
-Brush
Instructions
1. Cover your surface with scratch paper.
2. Put a little bit of modge podge on you jar, and stick tissue paper on it. It then, continue to cover the jar in tissue paper, and apply modge podge over top. You don't need any underneath the paper, just make sure the top part is covered.
3. If you want glitter, carefully sprinkle it on the jar while the jar is still wet.

Hope you enjoy!!!!

Lots of Love,

Rapunzel 


Tuesday, July 5, 2011

Abigail Adams

When I was a wee little flower, my favorite games were pretend.


Lets pretend I'm Cinderella!


Lets pretend I have a sister!


Lets pretend I am on a safari!


Lets pretend my doll is my sister!


Lets pretend I'm a pilgrim!


Lets pretend my doll is in a one room school house and I'm the teacher!


Lets pretend my room is a house in Williamsburg, Virginia, and I am under a pile of blankets because I am hiding from the British!


And the list goes on...


and on...


and on.


I played dress up and pretend well into fifth grade. It was creative, so it was where I was comfortable. As you can see, the kinds of games I played varied as I got older.


I think that is the key to playing pretend. It is easy to imagine anything that you love. I loved my American Girl Books, and as a result, some of my pretend was from history.


History can seem like a really boring concept to a little girl...especially because it seems like it is full of boys!!! It isn't like fairy tales , with the fancy dresses, and the glitter magic, where the good people live happily ever after..or is it?


I think that the real women in history can be just as exciting, and have just as glamours stories, it just depends on how you look at it.


When you find out a ball gown from the 1700s


 looks as good as Belle's dress,


 Abigail Adams becomes much more interesting...


Who is Abigail Adams you may ask?


Abigail Adams was the wife of John Adams. They had one of the first modern relationships between a man and a woman. They wrote letters back and fourth, in which she gave him some very good advice about writing the Constitution. In one of her letters she wrote, “Remember that all men would be tyrants if they could. If particular care and attention is not paid to the ladies we are determined to foment a rebellion and will not hold ourselves bound by any laws in which we have no voice, or representation.” Do you realize what this means? This means that Abigail Adams actually predicted the Women’s right’s movement. But not only that, she also predicted the way it would be done. “But you must remember that arbitrary power is like most other things which are very hard, very liable to be broken; not with standing all your wise laws and maxims, we have it in our power not only to free ourselves but to subdue our masters, and without violence, throw both your natural and legal authority at our feet.” Unfortunately, this advice was not used it the Constitution. But, isn’t it crazy that 144 years before women received the right to vote that someone actually predict it?


This may not be exactly the kind of story that captivates your five year old princess, but it may inspire a nine or ten year old princess. And isn't that the purpose of a fairy tale, to inspire? 


Lots of Love,


Rapunzel


P.S. Need a project to go with the story? Here are some really cool Colonial Coloring Pages, enjoy!


P.P.S. What does a colonial ball gown have to do with Abigail Adams, well not only did she write brilliant letters, but she also attended parties , and well, balls!